How to Clean a Generator Carburetor: A Step-by-Step Guide
Knowing how to clean a generator carburetor can save you from frustrating power issues and unnecessary repair costs. Over time, fuel residue and debris can clog the carburetor, leading to hard starts, rough running, or even stalling. The basic method involves turning off the fuel supply, draining old fuel, removing the air filter, and using a carburetor cleaner spray to clear out buildup around the jets and bowls.
the good news is it’s possible—especially for light cleaning. Simply spraying cleaner through the air intake and allowing it to soak and break down the gunk while gently running the engine can often restore performance. Just make sure the generator is in a well-ventilated area, and always follow safety precautions when working with fuel and engine components.
Cleaning your generator’s carburetor ain’t exactly like fixing a midnight snack, but it’s not rocket science either. Think of it as giving your trusty generator a spa day; a lil’ TLC goes a long way. We’ll walk through each step, making sure not to leave any nuts, bolts, or details behind.
To clean a generator carburetor, first turn off the generator and disconnect the spark plug. Remove the air filter and detach the carburetor. Drain any fuel, then disassemble the carburetor bowl. Use a carburetor cleaner spray to remove dirt, varnish, and debris from jets and components. Reassemble, reattach, and test the generator. Regular cleaning helps maintain performance and fuel efficiency.
Ready to get your hands a little dirty and your generator running smooth? Let’s dive in.
Preparing Your Generator for Cleaning
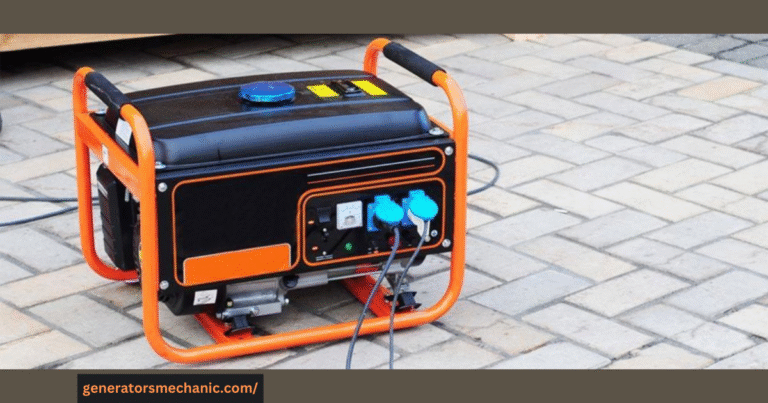
. Before doing anything, make sure your generator is turned off, unplugged, and completely cooled down.
Then, disconnect the spark plug to avoid any accidental starts. Having the right tools ready—like screwdrivers, a small brush, gloves, and a quality carburetor cleaner—will make the job smoother and quicker. Taking the time to prep properly ensures you don’t damage any parts and can access the carburetor easily when it’s time to clean it thoroughly.
Before we get our hands dirty, we gotta prep the stage. The generator carburetor is like the heart of the operation, mixing air and fuel like a DJ mixes beats. But when it gets clogged, your generator’s grooving stops.
So, we’re gonna disassemble the generator housing, careful not to misplace anything like the carburetor itself, those pesky connecting springs, and anything else holding the carburetor to its lifeline. This step is like the warm-up before the main event; getting everything in place for the grand performance of cleaning.
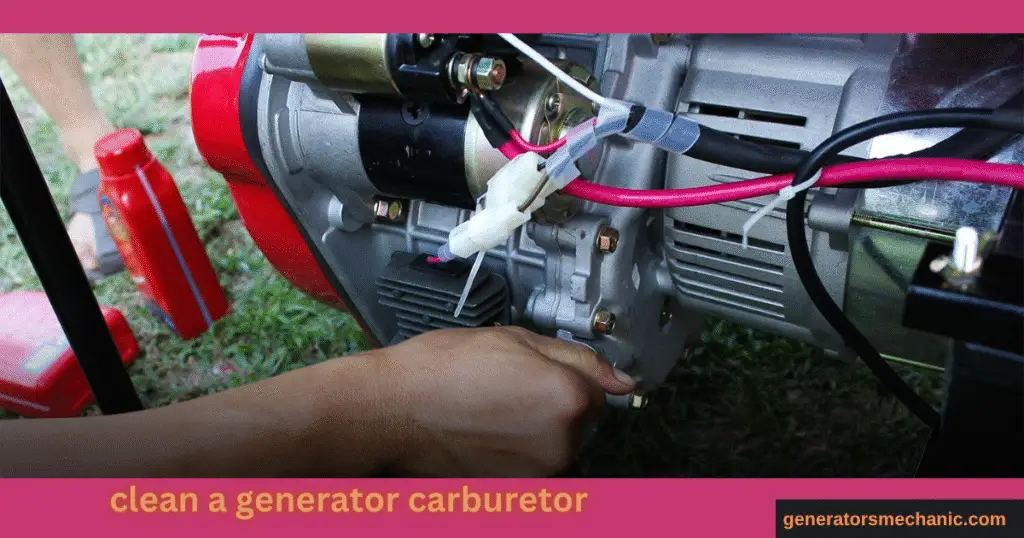
Safety First: Disconnecting Your Generator
Alright, your generator might be a beast, but we ain’t trying to wrestle it. First off, disconnect the generator. We’re talking no sparks, no power, nada. It’s like telling your generator, “Take a nap, buddy. We got some cleaning to do.”
This step makes sure we avoid any “shocking” developments. It’s all about keeping it safe and smooth, ensuring the only thing we’re firing up today is our cleaning game.
Essential Tools and Materials for Carburetor Cleaning
Now, I’m no magician, but the right tools can sure make dirt disappear. For this gig, we need some specific gear. Picture this: a carburetor cleaner that’s gonna cut through grime like a hot knife through butter, and some trusty wrenches and screwdrivers to get where we need to go.
Not to mention, a couple of rags and brushes to get into those nooks and crannies. It’s like assembling a cleaning dream team; each player with their own special move.
Including WD-40 and Other Cleaning Agents
When it comes to cleaning agents, think of WD-40 as the VIP guest. This stuff is like the secret sauce, making dirt and grime vanish without a trace.
But it’s not flying solo; we’ve got carb cleaner and maybe even a spray dryer to join the party. It’s all about getting that carburetor from grimy to shiny, ready to breathe life back into your generator. So, gear up; it’s showtime.
Removing the Air Filter: The Initial Step
Let’s kick things off by tackling the air filter, which is like the gatekeeper of your generator, making sure only the clean stuff gets through. Now, before we dive into the nitty-gritty of cleaning the carburetor, getting the air filter out of the way is key. This isn’t just about keeping it clean; it’s about giving us clear access to the carburetor, the heart of the operation. Once you remove the air filter, you’re not just taking a step towards a cleaner carburetor, but you’re also making sure that everything we do next is focused on where it really matters.
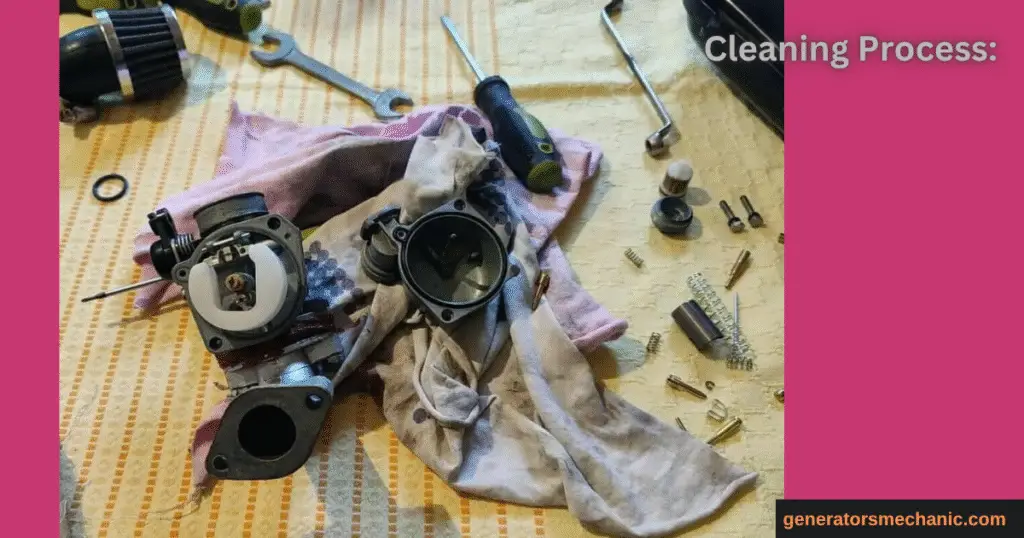
The Cleaning Process: Detailed Instructions
. A clogged carburetor often leads to poor engine performance, hard starting, or even a complete failure to run. Thankfully, with a few basic tools and some patience, you can clean it effectively right at home.
If you’re wondering how to clean a carburetor without removing it, the good news is—it’s possible! By using a carburetor cleaner spray and accessing it through the air intake, you can remove much of the buildup without disassembling the entire unit. However, for a deep clean, carefully removing and soaking the carburetor might be necessary. Always ensure the generator is off and cool before starting, and take photos of the setup before disassembly to guide reinstallation.
Cleaning the carburetor? Yeah, sounds complex, but it’s all about getting into that mix of air and fuel that powers your generator. The carburetor’s a small but mighty hero in this tale, making sure everything runs smooth. But, when it gets all gunked up with residue from old fuel, that’s when the trouble starts. Cleaning it isn’t just about sprucing up—oh no, it’s also about keeping your generator running like a dream and making sure it lasts. With the right tools in hand, those connected parts, like springs and other bits, need a good clean, too. And I’ll guide you through, step by step, ensuring you get every speck of dirt out without breaking a sweat.
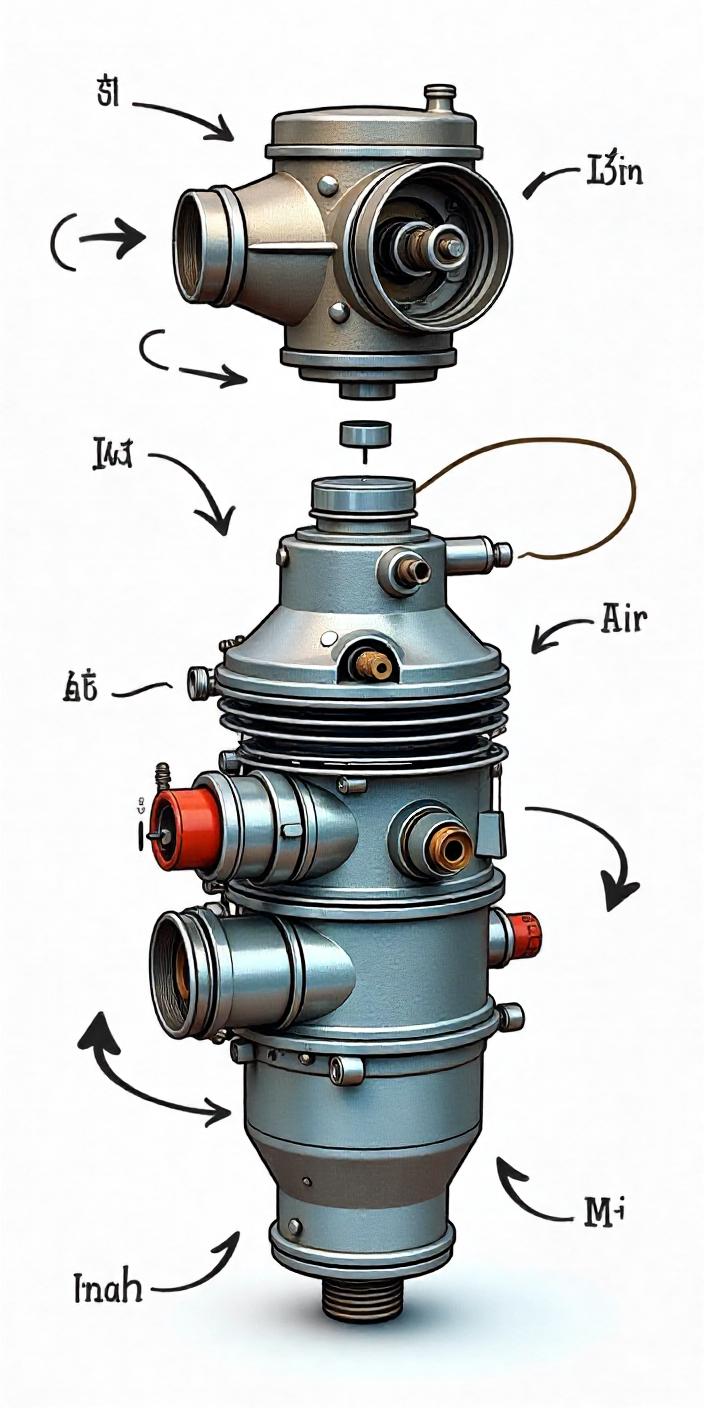
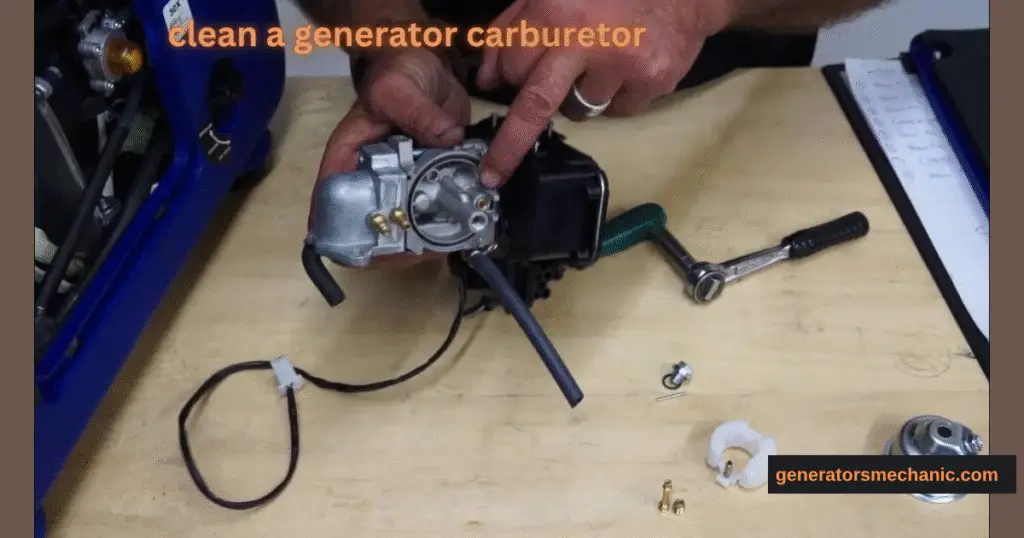
Accessing the Carburetor: Disassembly Tips
Alright, diving deeper into the heart of the beast, we gotta get to the carburetor. Now, this might have you picturing a complicated puzzle, but it’s more about patience than anything else. First off, removing the carburetor involves detaching it from the generator housing, which might sound daunting, but it’s just a couple of steps. You gotta disconnect those fuel lines carefully—think of them as the carburetor’s lifelines. And with a carb cleaner in one hand, we’ll slide the carburetor out of its fortress. It’s not about muscle; it’s about being gentle and precise, making sure not to damage anything while we gain full access to that carburetor.
Getting Rid of the Removable Parts
Now, with the carburetor in our hands, it’s time to strip it down. We’re removing any bits that can come off easily—think of it like peeling an onion, layer by layer. This isn’t just about making it easier to clean; it’s about getting a closer look at each part, checking for wear and tear. Every small piece we remove gives us a clearer path to a thorough clean, ensuring that once it’s all put back together, it’ll run smoother than ever.
The Role of WD-40 in Cleaning the Carburetor
Enter WD-40, the unsung hero in this cleaning saga. You might think it’s just for squeaky hinges, but oh boy, does it shine when you’re cleaning a carburetor. Spraying a bit of WD-40 on the grimy parts works miracles, loosening up all the gunk that’s been building up over time. It’s not just about making things slippery; it’s about getting right into the nooks and crannies, making sure that air and fuel can dance together again without stepping on each other’s toes. A dirty carburetor doesn’t stand a chance with WD-40 in the mix, making the cleanup a whole lot easier.
Applying WD-40 and Letting It Rest
After giving the carburetor a good spray with WD-40, the next step is a bit like baking—letting it sit. This isn’t about rushing through; it’s about giving it time to work its magic, breaking down the dirt and grime. Think of it as marinating your favorite dish; the longer it sits, the better it tastes. Well, the same goes for the carburetor and WD-40. Letting it rest allows the solution to penetrate deep, ensuring that when we get to scrubbing and rinsing, the gunk practically falls off, leaving our carburetor looking and working like it’s fresh out of the box.
Thoroughly Rinsing the Carburetor Components
Once you’ve got those carb components all laid out like a mechanic’s treasure map, it’s time to give them a good ol’ bath. But we’re not using soap and water here; we’re talking about carb cleaner. This stuff is like magic in a can, dissolving the gunk and grime that’s been camping out.
Make sure each piece gets a generous soak, kind of like marinating a steak, to ensure that all the dirt says its goodbyes. After the soaking session, grab a small brush — a toothbrush works wonders here, no need for anything fancy — and gently scrub away any stubborn bits sticking around. Finally, blast them with compressed air. Imagine you’re blowing out birthday candles, but instead, it’s all that loose dirt. This step is like the grand finale, ensuring all the nooks and crannies are spotless.
Reassembling and Testing Your Generator
Once you’ve completed the internal cleaning, it’s time to put everything back together—but reassembly is just as crucial as cleaning itself. . After carefully reattaching the carburetor and checking connections, give your generator a few minutes to warm up and stabilize.
If you’re dealing with specific models, knowing how to clean a generator Honda style can be helpful, as these engines often come with slightly different setups or screws. Once reassembled, test the generator under light load to confirm it runs smoothly without sputtering or stalling—signs that the cleaning was successful.

Now comes the puzzle part, putting everything back together. If you’ve ever felt the triumph of fitting that last piece into a jigsaw puzzle, you’ll love this bit. Start with all those shiny, clean carburetor parts. Make sure they find their way back home exactly where they belong. It’s a bit like reverse engineering; only this time, the reward is getting your generator humming again. Don’t rush through it. Take your time. It’s not a race. Once everything’s back in its place, give it the once-over, double-checking your work. You want to make sure that this reunion of parts is as sweet as a family gathering.
Carefully Putting Back Together the Generator Parts
Alright, so everything’s cleaned up nice and neat, and it’s time to play mechanic once again. Putting these parts back together is like completing a high-stakes Lego project. Each piece has its special spot, and if you’ve kept track of where everything goes, it’s satisfying to see it all come together. Make sure to tighten all screws and bolts. Think of it as tucking your kids into bed — not too tight, but just snug enough so they don’t wander off in the middle of the night. It’s all about securing those parts so your generator can wake up feeling refreshed and ready to tackle the day.
Reinstalling the Air Filter: Why It’s Crucial
Now, don’t forget the air filter. This little hero deserves a clean spot back in the limelight. Sliding the air filter back into place is crucial; it’s like putting the crown on your generator’s head. It keeps the bad stuff out so your generator can breathe easy, ensuring that every breath it takes is as clean as a whistle. A clean air filter means your generator runs smoother and happier, kind of like how you feel after a good meal. It’s all about giving your generator the royal treatment it deserves to keep running strong.
Starting Your Generator: The Final Check
With everything back in its place, it’s showtime. Starting your generator now is the moment of truth, like the drumroll before the curtain rises. You’ve put in the work, cleaned, scrubbed, and reassembled, and now it’s time to see if your generator purrs like a kitten. Flip that switch or pull that cord with the confidence of a magician revealing their final trick. Listen for that smooth operation, the sound of success. This final check isn’t just a test; it’s confirmation that you’ve nailed it. And when that engine hums to life, take a bow, because you’ve just ensured your generator is in top-notch condition.
Maintaining Your Generator’s Carburetor Long-Term
Understanding to clean a generator carburetor is key to keeping your unit running smoothly for years. Over time, carburetors can get clogged with old fuel residue, dirt, or moisture—causing your generator to sputter, run unevenly, or not start at all. Regular maintenance ensures proper fuel flow and combustion, which directly affects performance and fuel efficiency.
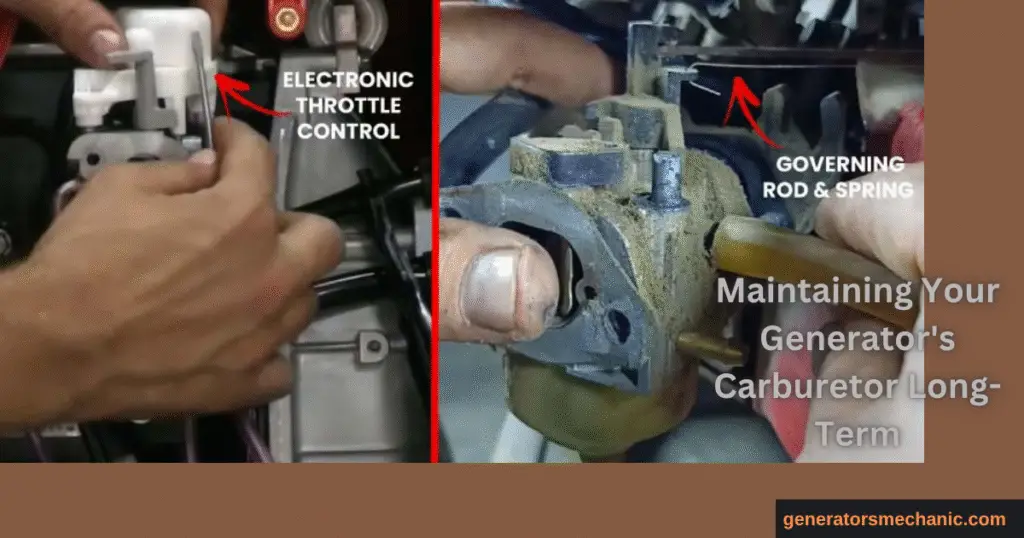
For those using specific models like Generac, it helps to know the exact steps of how to clean the carburetor on a Generac generator, including safely draining the fuel, removing the bowl, and clearing out debris with a carburetor cleaner. Doing this at least once a season—or after long periods of storage—can dramatically extend your generator’s life and keep it ready for emergencies.
Keeping your generator’s carburetor clean isn’t just a one-time magic trick; it’s more like a regular health check-up for your machine. Imagine it’s like brushing your teeth. You wouldn’t do it just once and call it quits, right? Regular carb cleaner sessions help ensure your generator stays in peak condition, ready to spring into action whenever you need it.
It’s like giving your generator a spa day, ensuring it stays fit, healthy, and ready to power through anything. So, mark your calendar for regular carburetor check-ups, and your generator will thank you in its own humming, purring way.
Regular Cleaning Schedules to Keep in Mind
Creating a routine for cleaning your generator’s carburetor is like setting up coffee dates with an old friend; you gotta keep them regular to maintain the relationship. Depending on how often you use your generator, mark down a cleaning schedule. Maybe it’s after a certain number of hours of use, or perhaps it’s seasonally, like swapping out your wardrobe. This regular maintenance is not just about keeping things running smoothly; it’s about extending the life of your generator, making sure it’s always there for you, ready to light up your world whenever you flip the switch.
Air Filter Maintenance: Ensuring Optimal Performance
Don’t overlook the air filter; it’s the guardian of your generator’s inner workings. Keeping it clean is like making sure the goalie of your favorite soccer team is always on their A-game.
A clean air filter ensures that only clean, pure air reaches the parts of the carburetor, keeping everything inside running as smoothly as a river.
It prevents all that nasty stuff — dirt, debris, the occasional bug — from taking a tour inside your generator. Regularly checking and cleaning your air filter isn’t just about maintenance;
it’s about keeping your generator running so smoothly it could win a marathon, all while protecting it from the gunk that wants to slow it down.